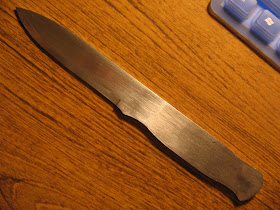
One day I got the crazy idea of making my own knives. I used to sorta collect knives, but I never had any very good quality ones. I knew I could probably make a better knife than the average crappy store bought stainless knife.
Most knives are made of 440 stainless steel. Stainless steel has its place. For instance, it's good for low maintenance non rusting blades, but generally, high carbon steel blades are superior. Steel is an alloy of iron with a small amount of carbon added (.2%-2.1%) I believe. The carbon is what makes the steel hard, so steels with a higher carbon content are harder and will hold an edge longer.
The first step for me was to build a forge. I built a makeshift one in about an hour out of an old car wheel.
A basic forge consists of a firepot to hold the fuel, and some type of blower to force air through a tuyere under the coals.
I just used a blow-dryer as a forge blower and it moves plenty of air. The first time I tried the forge I just used some leftover charcoal from a campfire and some raw wood. even with the raw wood it worked ok, but not what you would want to do unless you had to.
The next part was making actual charcoal. Some people use coal which is good for most blacksmithing applications, but the one time I used coal, it smelled very strong, made tons of smoke, and didnt burn very hot. Plus, I didn't know of any place to purchase coal. I need to be able to reach welding temps in my forge so I decided to go with charcoal. Charcoal, is a bit better for knife-making because it burns hot, has almost no smoke, has little ash, and can actually put some carbon into the steel. It also burns much hotter so its easier to reach welding temps. The process for making charcoal is fairly simple and there are a few ways of doing it. You take a bunch of scrap wood, put it in a sealed metal container with a small vent, and then cook it over a fire for a few hours. The wood heats up and all water and most of the wood is burned away without actually catching fire because there is no oxygen inside the container. After a few hours your left with charcoal. The hard part is knowing when its done. The idea is that the heat will cook away all the impurities in the wood leaving almost pure carbon, but won't let the wood catch fire because there is no oxygen in the container. I got an old smoker from my friend. It had a door that opens but was open at the bottom. I just put some sheet metal over the bottom of the smoker to seal it up.
I tried it out and this is what it looked like. All of the smoke coming out of the container is wood gas, which is flammable and can be fed back into the fire to decrease the amount of wood needed to heat and increase the efficiency of the charcoal production. It worked and I was left with some pretty nice charcoal.
Knives!
As I talked about earlier, high carbon steel is great for knives. Some places you can find it are old tools, leaf springs, certain automotive scraps, and things like that.
After I built the forge, I wanted to try it, so I took a piece of high carbon steel that I got from the metals shop at school and started hammering. I am not sure exactly what type of steel it is but I know its tool steel of some sort.
I used an old piece of railroad track as an anvil.
The shape was pretty random, I just started hammering.
Heres what the knife looked like after a bit of grinding and shaping.
Next it was time for a handle. I cut a few pieces of wood and leather and layered and glued them on the tang. After that I shaped the handle and was left with this.
This knife was fun to make, but I don't think I really like it that much haha. It was more just experimentation.
Knife No.2
I started making another knife, this time out of an old file.
(ignore the sketches in the background)
I used a round file to do some decorative work on the top.
this one has copper in the handle.
The sheath was made by cutting a piece of redwood in half, then hollowing out the insides to the shape of the knife, then gluing them back together.
This one is a little better than the other one but still rushed.
Knife No.3
This knife is also made from an old file.
This knife has a scandi grind bevel. It makes it nice and easy to get a razor sharp edge. Its pretty much the common bushcraft style you see. It still needs a bit of shaping in this picture.
Did some more file work on this one, more of a vine pattern.
This knife isn't finished yet.
Back to the charcoal making. I still was not completely happy with the container I was using. It was too small to really get a good batch of charcoal, plus it had too many holes and too much oxygen could get inside. It also was a pain to use because of the door. The second time I tried it at my friends house, it fell of the log stands and the door opened and all the charcoal burned up! So, I started looking for a 50 gallon steel drum to make a better charcoal barrel, or whatever you want to call it. I found a 50 gallon drum with a removable lid and vent already on it.
I tried it and cooked the wood for something like 6 hours till it stopped smoking. After it cooled, I opened it up and it was only half cooked! So, I cooked it for another 6 hours and opened it and it was still not cooked! I think the problem is that the vent tube is too small and it gets clogged up with tar and doesn't let any gas escape. So I'll have to put a bigger vent on it.
Forge No.2
The first forge was just temporary, and well, it sucked. The fire pot was too deep, so it was hard to heat up longer pieces evenly. I plan on making some swords, so I needed a longer forge. I decided to build a ground forge that resembles a japanese forge. It is open on both ends so a long piece can be put in one end can stick out the other.
Not the best picture, but you get the idea. You can see the blow dryer feeds into a tube that goes underground and leads to the forge. This forge worked great! It gets super hot, I melted a bit of steel in it, so yeah, it gets hot. It will be great for making Damascus billets.
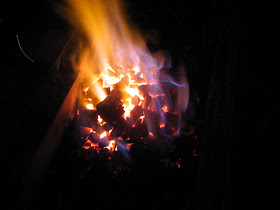
Heres some random night pictures.
Knife sharpening and polishing.
To polish my blades I was just using high grit sandpaper, which works but you get uneven cuts and not very crisp edges. I was inspired by the japanese bladesmith's techniques, and there method of polishing and sharpening blades is using water stones. Japanese water stones are great because they wear away as you use them, so you get a very nice even cut. I bought some and they're great!


No comments:
Post a Comment